
INSTRUCTIONS FOR ASSEMBLING
MY TALKING WALLS CRAFT KITS:
(*Tip: I do not modge podge over the paper, only the backsides.)
Go Here for steps to a perfect modge podge job:
-----------------------------------------------------------
INSTRUCTIONS FOR MAKING
THE 2015 CHRISTMAS CRAFT KITS:
1. T'was the Night Before Christmas Sign

Paint your board white
Sand your edges
Lay all the Vinyl out on your board to ensure spacing
Pick up each sticker one at a time and apply vinyl in it's slot
Distress the edges if you like with an ink pad
2. Warm and Cozy Christmas

Paint your board white
Sand your edges
Apply the red Vinyl first
Apply the grey vinyl
Sand and distress your edges
Tie the ribbon on the side
3. Reindeer Names Board

Paint your board white
Sand your edges
Lay out all your vinyl stickers on your board to ensure spacing
Pick each sticker up one at a time and apply to your board
Distress edges if you wish with an ink pad
4. All Hearts Come Home

Paint your board white
Sand your edges
Apply the red vinyl first
Apply the Grey Vinyl
Add your red heart on the state where you wish
Distress edges with ink pad if you like
5. Merry Christmas Stackers

Paint your blocks white
Sand your edges
Apply Vinyl
Distress edges with ink pad if you like
Tie with ribbon
6. O Holy Night


Paint your board white
Sand your edges
Place the vinyl stickers on your board to ensure spacing
Apply the Blue (or black) Vinyl first
Apply the Red Vinyl
Distress your edges with an ink pad if you wish
7. Merry Mail

Paint your Board White
Sand your edges
Distress your edges with an ink pad if you like
Apply the Red Vinyl first
Apply the green polka dots
About 1/2" from the bottom, screw in the hooks by simply
pressing them into your board and twisting down.
They will go it, no need for drilling holes.
I put one on each end and one in the middle at 15"
Run your twine thru the holes and tie at each end in 2 knots.
Use your clothes pins to clip your Christmas Cards to the twine!


8. Christmas Candles

2. Apply the Vinyl Stripes all the way around the block
3. Paint White paint OVER the entire block including over the vinyl strips with the white paint. Let dry.
4. Peel off the strips revealing the red stripes
5. Sand over the whole thing distressing it and bringing some of the red paint thru the white
Put Candle in hole in top.
MIDDLE CANDLE: 1. Paint the whole block White.
2. Once dry, Paint over the white with red. Let dry.
3. Sand the entire block well distressing it so the white shows thru the red.
4. Tie the twine around the top
5. Put Candle in the hole in the top.
SMALLEST CANDLE: 1. Paint the whole thing red. Let dry.
2. Apply the Vinyl Circles
3. Paint OVER the entire Block including over the circles with white paint. Let dry.
4. Peel off the circles revealing the red dots
5. Sand over the whole thing distressing it and bringing some of the red paint thru the white paint
Put Candle in the hole in the top.
9. JOY Sign

Paint your board white. Let Dry.
Apply the JOY Vinyl Stencil Letters to the board.
Paint over the board and letters with red paint. Let dry.
Peel off the JOY letters revealing the white paint underneath.
Distress over the whole board well, pulling some of the white paint thru the red paint.
Tie on the raffia.
10. Slats Sign

1. Paint on a thin white wash over your sign.
I diluted white paint and brushed it on doing a thin coat.
2. Apply the 4 Vinyl Stencils to each slat making sure to rub it on good so paint does not seep underneath your stencil.
3. Paint inside the stencil letters with red and green paint. let dry and remove the stencil.
Sand over the entire sign including over the lettering to distress and pull some of the wood thru the paint giving it the aged and weathered look.
11. Christmas Begins With Christ Tile

Make sure your tile is clean.
Apply the red vinyl first
Apply the green vinyl next
Apply the black vinyl last
Distress edges of your tile with a permanent ink pad if you wish
12. Guide my sleigh Tile

Make sure your tile is clean.
Apply your Black Vinyl Sticker over the top of the whole tile.
You can use a razor blade to trim vinyl off the edges if need be. Just be sure to get it on straight so the black rectangle fits exactly onto the 9x12 tile.
Apply the Red Vinyl nose.
13. Sorry About Grandma

Make sure your tile is clean.
Apply the red vinyl sticker to the tile
Distress the edges of your tile with a permanent ink pad if you wish.
14. Nativity Tile

Make sure your tile is clean
Apply the black vinyl sticker to your tile
Distress the edges of your tile with a permanent ink pad if you wish
Tie on your twine.
15. Jingle Bells Block

Paint your block white
Sand your edges
Apply the red vinyl
Distress your edges with a permanent ink pad if you wish
Tie on the ribbon and jingle bells. Use hot glue if needed to hold the jingle bells in place.
******************************************************
INSTRUCTIONS FOR MAKING
THE 2014 CHRISTMAS CRAFT KITS
Away in a Manger

1. Take out the papers inside your shadow box.

I used a double sided tape to get it to stick to the cardboard


4. Put the raffia in the box at the bottom.

5. Put the scrapbook paper in your box with the back cardboard piece and shake it around to get the "hay" to lay
how you want it.

Countdown to Christmas Sign

I used "lipstick red" by folkart


where you want them


8. Push the wire from the back into the pre-drilled holes at the top


I use a permanent ink pad pictured below

\
Joy to the World Board
1. Paint your board white
2. Lay your red and black stickers on your board
to line them up where you want them to go so they are centered and straight on your board
3. Pick up the Red Joy and apply it.
Pick up the black vinyl and apply it and so on,
leaving the other stickers on the board as a guide to where to put your letters.
4. Distress your edges.
I use a permanent ink pad called StazOn

Christmas Stacker Blocks
1. Paint your blocks green and red.
I used Bright Green by FolkArt and Apple Red by FolkArt
2. Sand your edges
3. Apply the White Vinyl Lettering as shown
4. Distress your edges if you like.
I use a permanent ink pad called StazOn
5. Tie the ribbon around the whole thing to make a bow on the top.

Stocking Holder Board
1. Paint your board white
We used Ultra White by Valspar
2. Sand your edges
3. Lay the vinyl out where you want it so it is all straight and centered on your board.
4. Apply each vinyl sticker one at a time. Green, Red, Black.
**Use the row of circles as a guide to where to nail in your nails.**
So you will want to apply your row of vinyl circles, nail in your nail into the center of circle, then remove the vinyl circles.
This will help get the nails lined up nice and even.
5. Distress your edges if you would like.
We use a permanent ink pad called StazOn.

Santa Claus is coming to town board
1. Paint your board red
we used Classic Red by Valspar
2. Sand your edges
3. Apply your Vinyl.
Apply the White vinyl lettering first
(but NOT the 'is coming")
Apply the Black Vinyl "Belt
Apply the Yellow Vinyl "Buckle"
Apply the White "is coming" vinyl
4. Distress your edges.
we use a permanent ink pad called StazOn

Christmas Tree Trio
1. Paint your trees Green
We used Greenway by Valspar
2. Paint your stars Red
We used Classic Red by Valspar
We also sprayed over the red, after it dried, some clear glitter.
It comes in a spray can from Michaels.
3. Apply your vinyl stripes and dots where you would like them.
4. Hot Glue stars to top of trees

Wonderful time of the year board
1. Paint your board white
We used Ultra White by Valspar
2. Sand your edges
3. Apply your Black Vinyl first
4. Apply the red "Wonderful" Sticker
5. Distress your edges.
We use a permanent ink pad called StazOn

INSTRUCTIONS FOR APPLYING
EASTER
VINYL
Paint your board.
I used this yellow for mine

Lay all the vinyl onto your board so it lines up
straight and all fits on there

While leaving your vinyl on the board still,
lift the banner and apply it first.
The edges should go off the board a tad, just simply trim those off with an razor blade

Next apply the chocolate brown vinyl all as one sticker, leaving the bottom row of peeps still laying there so u make sure it all fits and is lined up!

Then you can add your bottom row of peeps...

Next take your colored EASTER stickers and just apply them one by one right over the top of your brown letters...
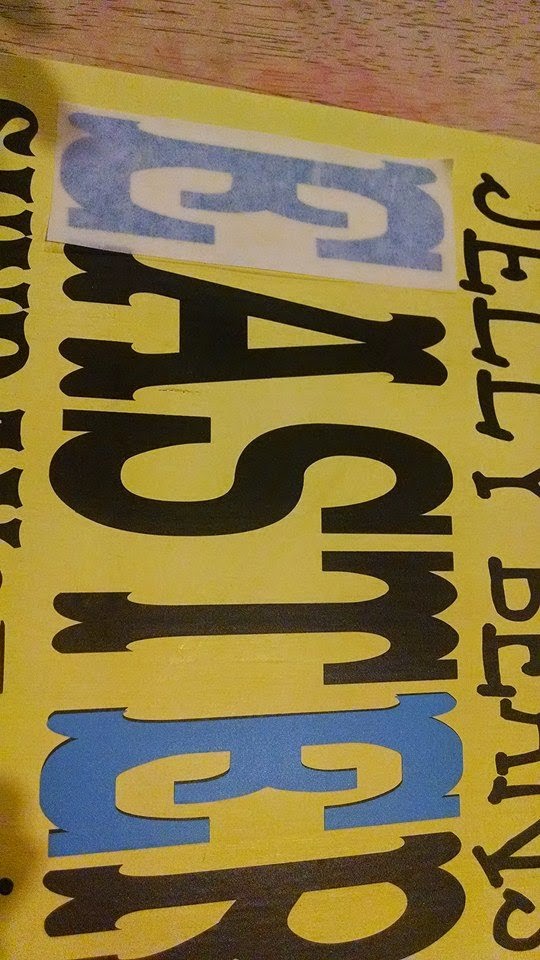

Then add your 4 eggs onto the banner

Sand and ink your edges if you would like for a finished look.

Done!

For the Spring Board, which you can do on the back of your Subway Art Board above,
Simply paint the board yellow like above.
Add the Blue sticker first, then add the pink flower.
Sand and ink your edges if desired!

INSTRUCTIONS FOR
"BE MINE"
CRAFT KITS


1.

2.

3.

4.

5.
Make sure to put the letter "N"
down low on the block so you have
enough room for you ribbon at the top!

6.
I use a StazOn ink pad

7.

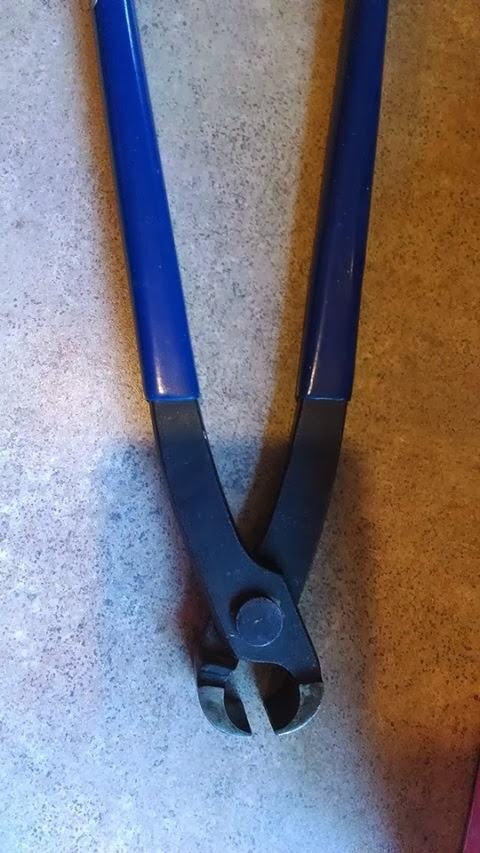
8.


you might have to use a wire cutter to
trim it to the length you want
10.

11.
Stick the wire into the hole we drilled for you

It can be removed for easy storage

DONE! :)

The paper is double sided so you
can use any side you wish.


-------------------------------------------------
INSTRUCTIONS FOR
"THE 12 CRAFTS OF CHRISTMAS"
KITS 2013
Merry Christmas Blocks

#1-paint blocks
#2-sand & distress edges

#3-apply vinyl

#4-tie ribbon around the first "R"

Believe in the Miracle Tile

#1-Modge Podge Paper onto your tile


#2-apply red oval vinyl
#3-apply white vinyl on top of red oval

Tinsel in a Tangle Board

#1-paint board
#2-sand & distress edges

#3-apply vinyl
(leave room on the side for your ribbon)

#4- tie knot in ribbon & glue on board

On Dasher, On Dancer Board

#1-paint board
#2-sand & distress edges

#3-apply vinyl

#4-string green ribbon through 2 bells & tie in a bow
#5-glue bow onto board

Holly Jolly Christmas Board


since it overlays onto the red Christmas Vinyl


Santa Stops Here Blocks

(I did green at first then changed it to red, so paint as you wish!)


#5 Hot Glue your mini hot to the top block


Baby its cold outside Board

#1 Paint your board red


that we have traced on for you.


to assemble your Santa hat onto the "C"


Away in a Manger Blocks
#1 Paint your Blocks
#2 Sand the edges
#3 Apply Vinyl
#4 Tie raffia around both blocks

Shepherds Saw Tile
#1 Wash your tile with water and a paper towel so it is clean
#2 Apply your Vinyl Lettering

Snowman Board

#1 Paint your board blue and your 3 blocks white

(distress with an ink pad If you would like, I forgot to!)

3. Tie the scarf around the bottom of the block that is
3.5" wide x 4" tall
(his head)
MAKE SURE THE 4" TALL IS VERTICAL NOT HORIZONTAL LIKE THE REST OF HIS BODY!


Hot Glue the hat to the top of this same block

MAKE SURE YOU PUT THE FABRIC RIGHT UP TO THE END OF THE BLOCK AND HOT GLUE IT ON SO YOU HAVE ROOM TO TIE OFF A SHORT SPOUT ON TOP!

Gather and tie the hat at the top

Add his face.
I tried using some of my blush on his rosy cheeks

Once your Hat, Scarf and face is assembled onto the top block,
BEFORE gluing him to the board,
Glue the blocks one on top of the other.
Stack them in this order and use hot glue to stick them together:
3.5" x 3.5" top block
3.5" x 4.5" middle block
3.5" x 5" bottom block
Once they are glued together THEN glue his whole body down on your board using hot glue.
(you can even screw in from the back screws or nails or a staple/nail gun to secure him there, just make sure not to go thru his body!!)
Once he is glued to the board, add the vinyl to the bottom

Next add his buttons and snowflakes


After all the vinyl is on and your snowman is in place,
drill a hole in both corners at the top for the wire to run thru

poke the wire from the back thru the board to the front

using a pencil, curl the wire around it to make it cute and loopy like this....

Now you can add raffia to your wire and he is ready to hang!

Bethlehem Board
#1 Paint your Board
#2 Sand Edges
#3 Apply White Vinyl

Santa's Elves Tile

#1 Modge Podge your paper onto your tile


Add the red polka dots...

Sand and distress the edges

And this is how it looks when complete...

--------------------------------------------------------------------------------------------------------
INSTRUCTIONS FOR
HALLOWEEN BLOCKS:

1. PAINT BOTH BLOCKS BLACK

2. SAND THE EDGES

3. APPLY THE GREEN
VINYL LETTERING

YOU WILL RECEIVE THE GREEN VINYL
AS ONCE STICKER TO APPLY ALL AT ONCE

4. APPLY THE PURPLE LETTERS RIGHT ON TOP OF THE GREEN LETTERS
(THIS MAKES IT EASY TO LINE UP AND KEEP IT SPACED AND STRAIGHT)

YOU WILL GET THE PURPLE LETTERS
LIKE THIS TO APPLY SEPERATELY

5. APPLY THE GREEN AND PURPLE TULLE AROUND
BOTH BLOCKS AND TIE A BOW AT THE TOP!

INSTRUCTIONS FOR DOUBLE SIDED HALLOWEEN SIGN:
SIMPLE OPTION #1

1. PAINT BOTH SIDES OF YOUR WOOD
ORANGE!!

2. APPLY YOUR WHITE CHEVRON STRIPES
(YOURS WILL BE WHITE)

3. APPLY YOUR BLACK VINYL LETTERING THAT SAYS
"TRICK OR TREAT"
OVER THE TOP OF YOUR WHITE CHEVRON STRIPES

4. FLIP YOUR BOARD OVER AND DO THE SAME ON THE BACK:
ONCE ORANGE WOOD IS PAINTED, APPLY YOUR WHITE POLKA DOTS
THEN OVERLAY THE BLACK VINYL LETTERING THAT SAYS:
"OUT OF CANDY"
OVER THE TOP OF THE WHITE POLKA DOTS


OPTION #2
(THIS IS HOW I DID MINE FOR A MORE PAINTED LOOK)
1. PAINT BOTH SIDES OF YOUR WOOD WHITE

2. ONCE THE WHITE PAINT IS DRY, APPLY YOUR CHEVRON STRIPES ON ONE SIDE AND YOUR POLKA DOTS ON THE OTHER SIDE

3. PAINT OVER THE TOP OF YOUR CHEVRON STRIPE VINYL WITH ORANGE PAINT COVERING THE ENTIRE FRONT OF YOUR BOARD

ONCE THE ORANGE PAINT DRIES, PEEL THE CHEVRON STRIPES OFF REVEALING THE WHITE STRIPES UNDERNEATH

NOW FLIP YOUR BOARD OVER AND PAINT ORANGE OVER THE TOP OF YOUR POLKA DOTS COVERING THE ENTIRE FRONT OF THE BOARD

ONCE THIS IS DRY, PEEL OFF THE POLKA DOTS REVEALING THE WHITE UNDERNEATH


YOU MAY NEED TO USE A SHARP TOOL LIKE THIS TO PEEL THEM UP WITHOUT CHIPPING THE ORANGE PAINT

SAND YOUR EDGES ON BOTH SIDES

APPLY THE BLACK VINYL LETTERING
TO BOTH SIDES
DRILL A HOLE IN THE CORNERS
FOR THE WIRE TO RUN THROUGH

MAKE SURE YOU LAY YOUR BOARD ONTO ANOTHER PIECE OF WOOD
TO DRILL YOUR HOLES.
I LEARNED THE HARD WAY AND ENDED UP WITH CRACKED WOOD!
:(
MY HUSBAND TAUGHT ME LATER THE CORRECT WAY TO DRILL A
HOLE INTO WOOD! I'VE BEEN CRACKING WOOD FOR YEARS AND DIDN'T KNOW THERE WAS A TRICK!!!!!
:-(

RUN YOUR WIRE THRU THE HOLES
AND WRAP THE ENDS UP AROUND THE WIRE

ADD YOUR RAFIA

NOW IT IS READY TO HANG!
---------------------------------------------------------------------------------
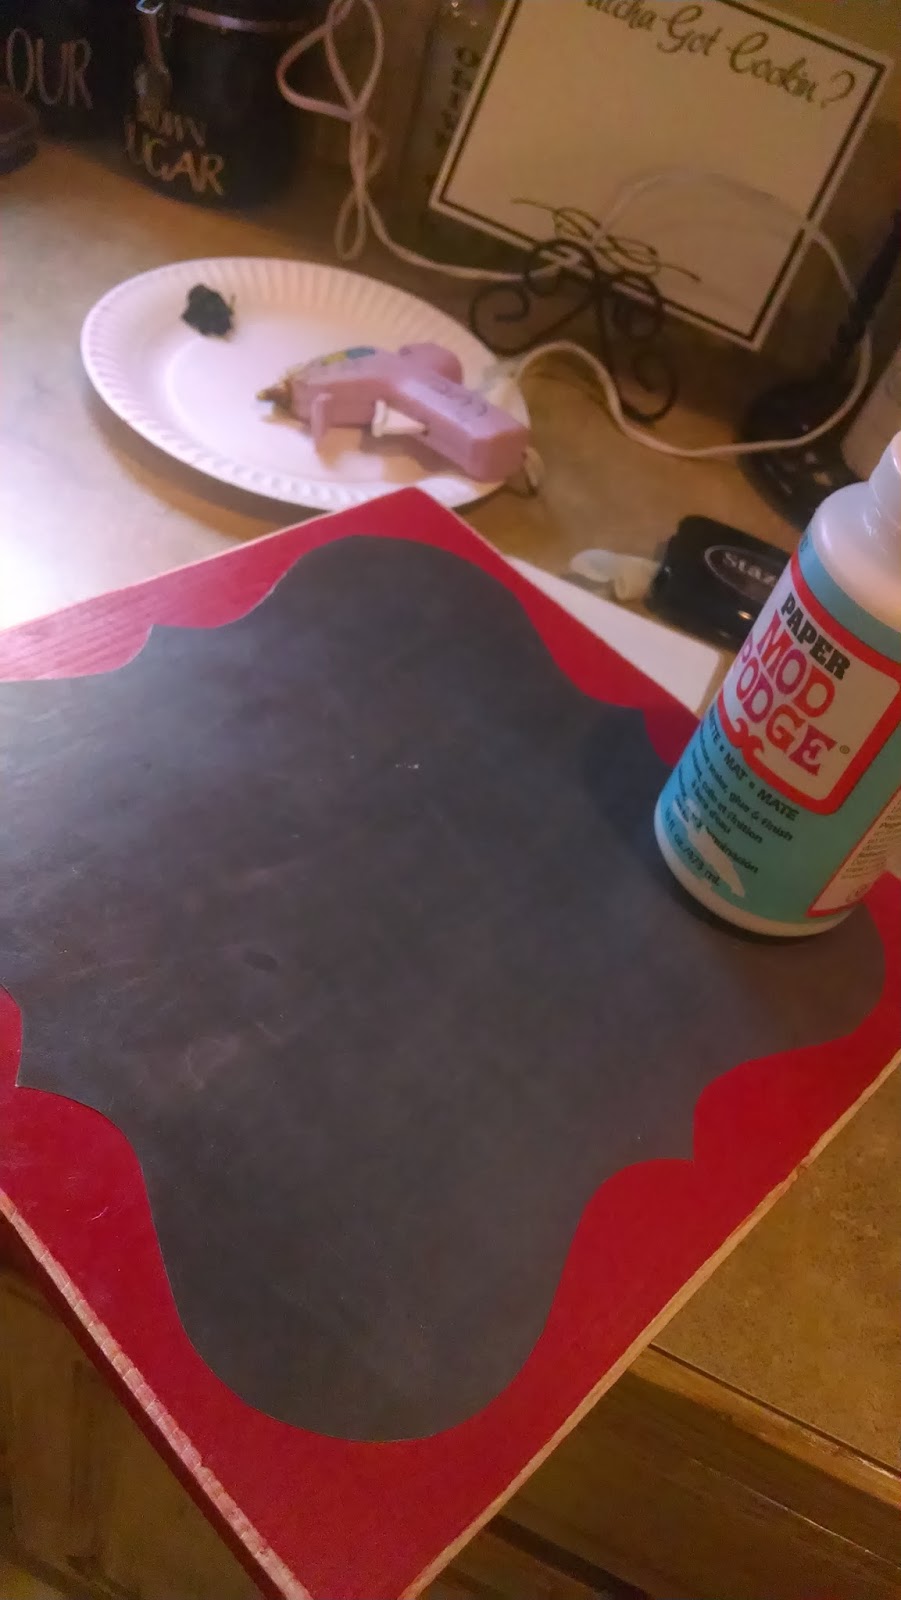
INSTRUCTIONS FOR
TEACHER SIGN:

1.
Paint the Back and Sides of your wood
any color you would like.
I used Red.
(this step is optional,
they are just as cute with no painted sides)

2.
Modge Podge the paper onto the
unpainted side of your board

3. Sand your edges
4. Apply Vinyl
Make sure to leave room
at the bottom for your ribbon!

5. Ink edges if you like

6. Tie Ribbon around bottom

And Give to a wonderful Teacher!!!

INSTRUCTIONS FOR MOTHER'S DAY PHOTO BOARDS

1. Paint your board
2. Sand Edges
3. Apply Vinyl
4. Tie Ribbon around bottom of frame
5. Hot Glue Frame onto Board
6. Ink Edges if you like


INSTRUCTIONS FOR
2013 EASTER KITS

"HAPPY EASTER" BOARD

1. Paint all sides of your board

This is the color I chose...

2. While the paint is drying on your board,
trace the wooden egg onto your paper and cut out.

3. Mod Podge the paper onto your wooden egg

4. Sand the edges of your board AND your wooden egg
5. Distress the edges of your egg and board if desired.
(I feel it gives it a finished look)

I use a permanent ink pad found in the scrapbooking section at Michaels
shown below...
shown below...

6. Apply your Vinyl Lettering

7. Hot Glue your wooden egg onto your board
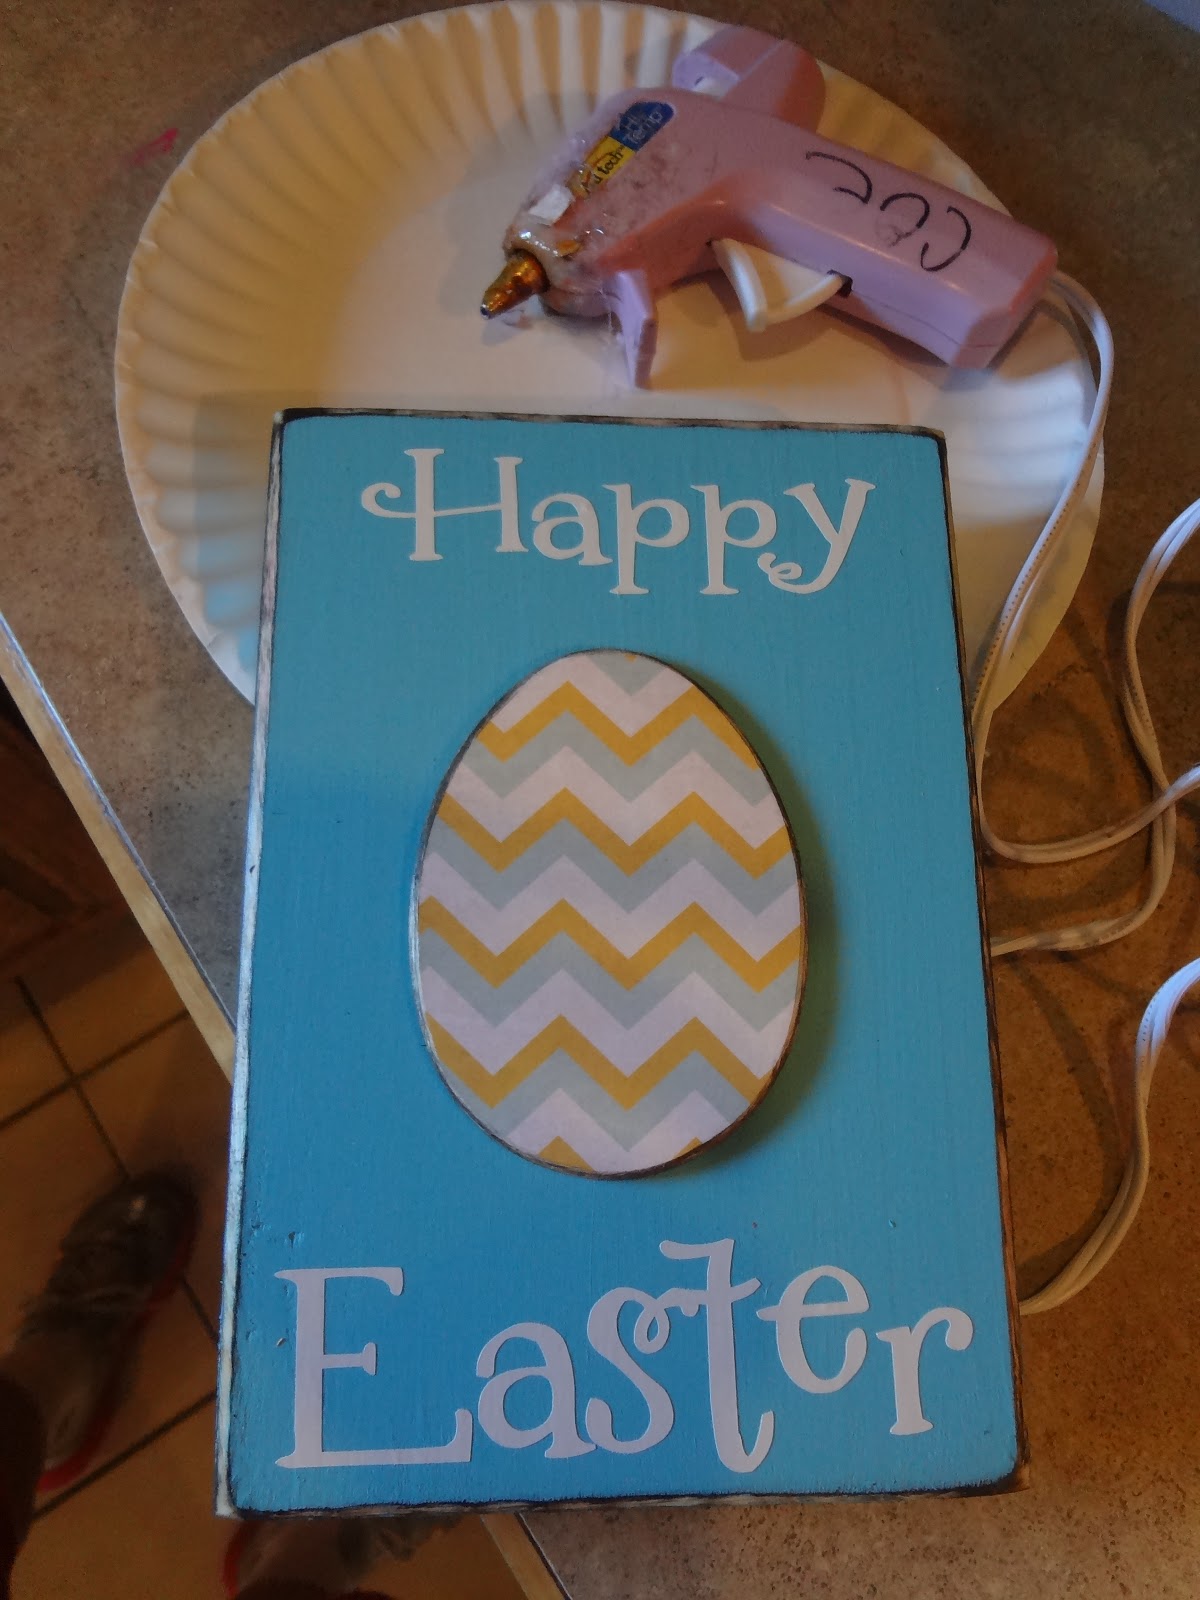
DONE!! :)
Easter Egg Trio

1. Paint all sides of your blocks

These are the colors I chose...

2. Sand the edges

3. Apply your Vinyl

4. Distress the edges if you like

DONE!!
"Hippity Hop" Bunny Board

1. Paint all sides of your board

2. Sand your edges

3. Apply Vinyl Lettering

4. Distress your edges

DONE!!
"CHOCOLATE BUNNY" BLOCK

1. Paint all sides of your block

I used this pink...

2. Sand your edges

3. Apply your vinyl

4. Distress your edges if desired

5. Tie a bow around your block

DONE!!
Love Sign & Happy Valentines Blocks!


1. Paint your wood

2. Sand Your Edges

3. Apply Vinyl Lettering

4. Distress Your Edges if you would like

5. Trace and Cut Out your Paper from the wooden heart.
(paper may vary)
(paper may vary)

6. Modge Podge the Paper Heart onto your Wooden Heart

7. Sand the edges of your Heart
and distress edges as well with ink pad
if you are distressing the blocks.

8. Hot Glue your stick onto the back of your Wooden Heart

9. Tie a bow around the stick
You may need a cute little helper like mine
You may need a cute little helper like mine
to hold the heart while you tie your bow! :)

10. Put the Heart Stick into the Hole I have Pre-Drilled for you! :)

Finished!

Follow the Same Steps for the LOVE Sign:
1. Paint the back of your sign
2. Sand edges
3. Apply Vinyl
4. Distress Edges
Paint the BACK of the board I send you.
Red, Pink, Black, any color would be cute!
These are Christmas Boards I found at the Dollar Store
Red, Pink, Black, any color would be cute!
These are Christmas Boards I found at the Dollar Store
and we are using the back sides for our
Valentines Day Sign!!!
They come with the rope ready to hang!!!
They come with the rope ready to hang!!!

Now you are ready to display
your cute crafts for
Valentines Day!!!


___________________________________________________________________________________
INSTRUCTIONS FOR NATIVITY BOARD.

1. Paint Your Board Black
2. Sand Your Edges
3. Apply the White Vinyl First
4. Apply the Red Vinyl
5. Spray a light mist of Glitter Paint to make it Sparkle! ;)(I bought my can from Michael's
with a 40% OFF Coupon!!)
with a 40% OFF Coupon!!)

INSTRUCTIONS FOR GRINCH BOARD
1. Paint Your Board Red
2. Sand Your Edges
3. Apply White Vinyl Lettering!

INSTRUCTIONS FOR SNOWMAN FAMILIES

Sizes of Pieces:
Hats: 9”Lx5”W
Trim for hats: 9”Lx1”W
Scarfs: 12”Lx1”WTrim for hats: 9”Lx1”W
Skinny piece of fleece
All in fleece material.
“B” is marked on bottom blockNoses are all the same size-in felt
Girls have eyelashes on their eyes (so make sure you pay attention when gluing)Jewels are for the buttons
Vinyl goes on the bottom block and for the smiles of the snowmen
1.
Paint all snowmen with white acrylic craft paint
with 2 coats.
You do not need to paint the top or the bottom of the 2x4. You will need to paint the bottom block (that the snowmen sit on) all the way around.
Paint all snowmen with white acrylic craft paint
with 2 coats.
You do not need to paint the top or the bottom of the 2x4. You will need to paint the bottom block (that the snowmen sit on) all the way around.
2.
Make sure that the 9” (long side of material, not the short side 5”) is what wraps around the 2x4. Lay the hat on a table and place your 2x4 face down on top of hat, then glue hats on with glue gun.
By doing it this way, it will help you get a straight line in the front of your snowman.
Glue the fleece all the way around the 2x4.
Make sure there is enough room for face between the hat and the scarf for the short snowmen so that the face doesn’t look squished
By doing it this way, it will help you get a straight line in the front of your snowman.
Glue the fleece all the way around the 2x4.
Make sure there is enough room for face between the hat and the scarf for the short snowmen so that the face doesn’t look squished


3.
Glue trim onto the bottom part of the hat just enough to cover the bottom part of the hat. Make sure all seams are in the back of the snowmen.


4.
Cut the hat into ½” (or skinnier) strips all the way around the hat. Stop about 1 inch before the top of 2x4.

5.
Use the skinny piece of fleece to tie the hat so that it scrunches together to make all the cut strips look spikey!! It doesn’t matter which color you use for the skinny piece of fleece.

6.
Glue the eyes and nose onto your snowman, very little glue is needed. Then apply the smiley face. Peel the vinyl away from the backing and press the smiley face onto your snowman.
7.
Tie scarf around your snowman before gluing it in place. I glue my scarf behind the knot so that it doesn’t move around when I pack it or move them around.
8.
Glue your buttons in place. You don’t need a whole lot of glue for each button. The way I arrange the buttons is the tallest snowman always gets 4 buttons, the next gets 3, the next gets 2 and the shortest gets 1. (for a set of 4 snowmen)
For more than 4 snowmen I give 4 buttons to the tallest, the next gets 3, the next two or three or four snowmen get 2 buttons each and the smallest always gets 1.
For more than 4 snowmen I give 4 buttons to the tallest, the next gets 3, the next two or three or four snowmen get 2 buttons each and the smallest always gets 1.

9.
Place “Love Never Melts” vinyl onto bottom board the same way you applied the smiley faces.
Now you have your snowman complete!!
You can call or email me anytime, if you need help.
Jeanise SwanerCell: 208.861.2118jeanisesmile@yahoo.com
Jeanise SwanerCell: 208.861.2118jeanisesmile@yahoo.com
-------------------------------------------------------------------------------------------------------------------
INSTRUCTIONS FOR VALENTINE'S DAY KITS:
CANDY BLOCKS
1.


2.

3.

4.

LOVE BLOCKS
1.

2.

3.

4.

5.

6.

7.

CUTE, CUTE!!!

OWL TILE
1. Clean your tile with water only and dry rag
2. Apply the Red Swirly Hearts in the two
bottom corners first! This allows you to center the rest of the vinyl.

3. Apply the two Black Owls

4. Apply the Red Quote at the Top of Tile,
Centered over your two Love Birds!

5. Add her bow and his heart

6. Add the black Heart first and then the two red hearts
(overlapping the side of black heart)

7. Ink your edges.
By using the Stazon Ink Pad, your ink will not smear, it is permanent.
I just take the whole pad and rub along the edges.

DONE!

------------------------------------------------
INSTRUCTIONS FOR HALLOWEEN SIGN
*UPDATE* to Instructions... I went back and did some heavier distressing to the edges of these shelf sitters and it made them super cuter!!
Especially the Halloween one- made it more "spooky"...
HERE IS THE BEFORE AND AFTER:

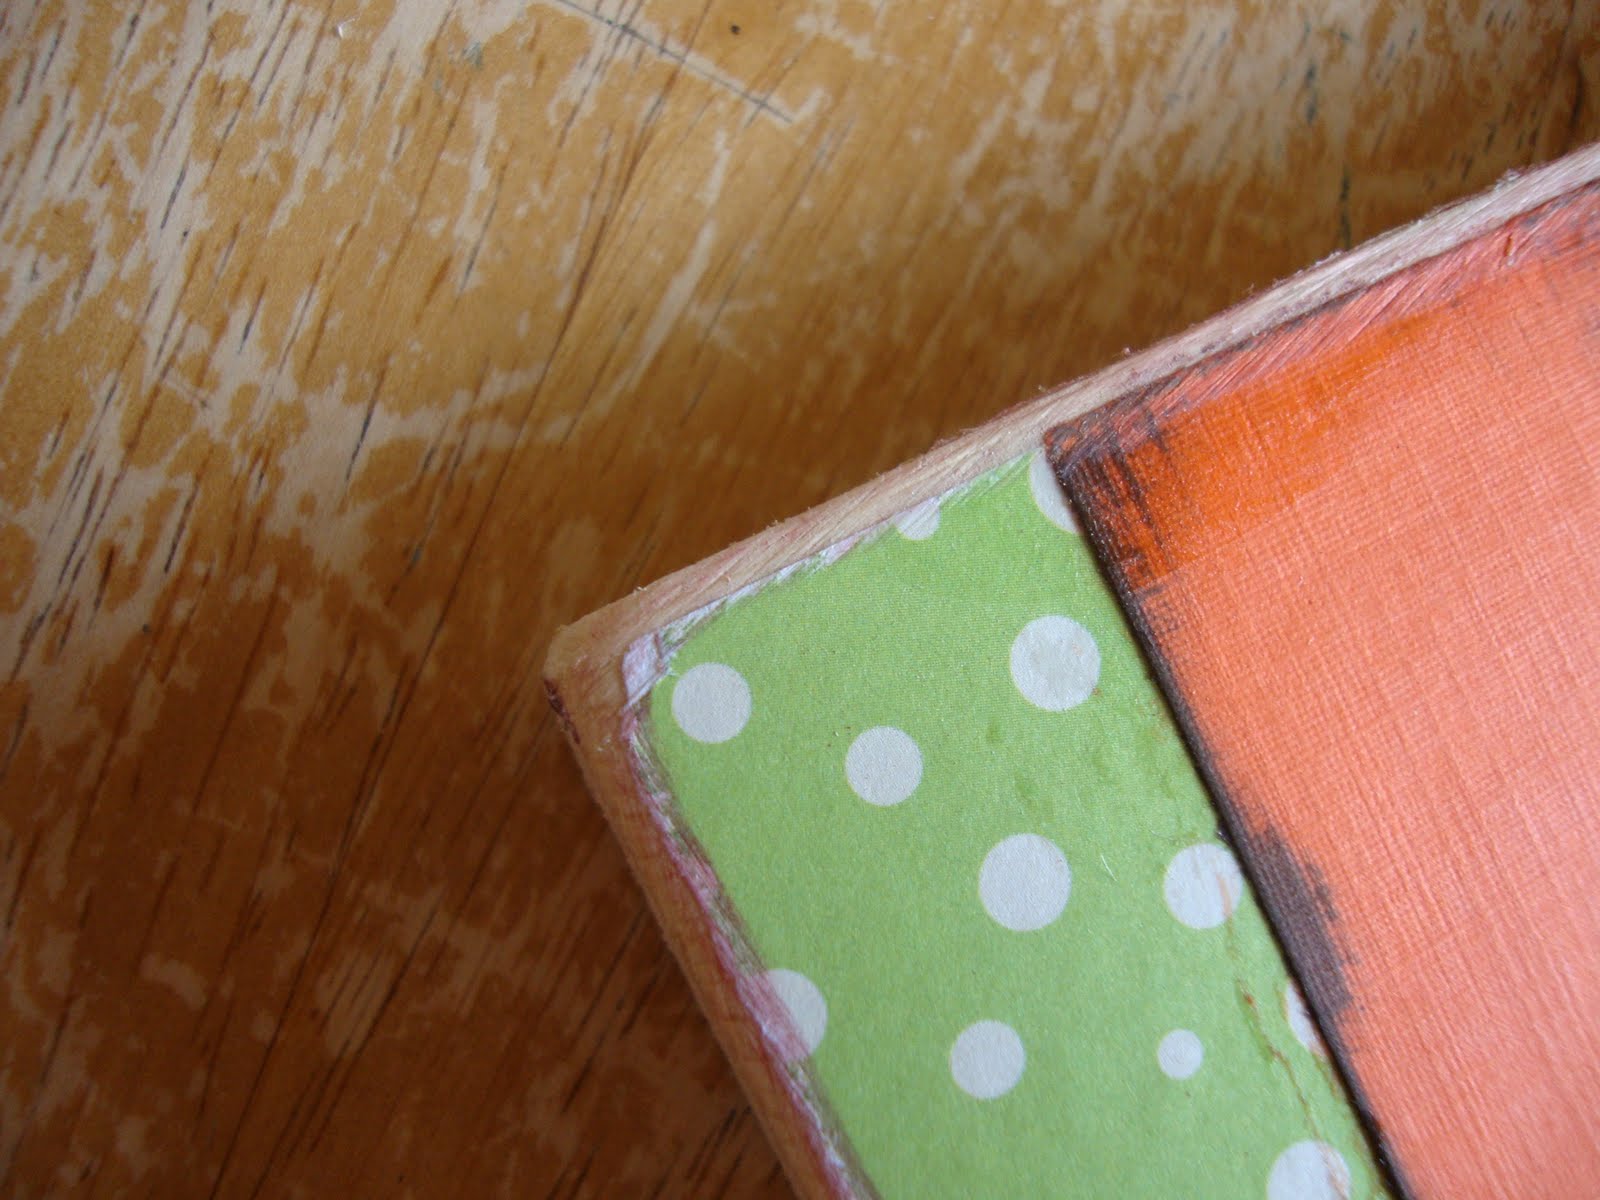
1. Paint the sides of your board (and the back if you would like, there is no need to paint the front since the paper goes there)
I forgot this step and had to do it AFTER I modge podged my paper on! Not fun, had to be careful not to get it on my cute, cute paper!!!! ;)

2. Distress the edges of your orange strip so it is ready to go when you modge podge!
I use an ink pad found in the scrapbooking section of your local craft store!

3. Modge Podge the green paper onto your board and then the orange strip onto the green paper


I DO NOT GO OVER THE TOP OF THE PAPER WITH MODGE PODGE!
CHECK OUT THESE STEPS FOR A PERFECT MODGE PODGE JOB:
4. Sand the edges of your board

5. Hot Glue the ribbon from the back so it is centered nicely over the orange.
No need to glue the front part of ribbon onto paper, just glue from the back.
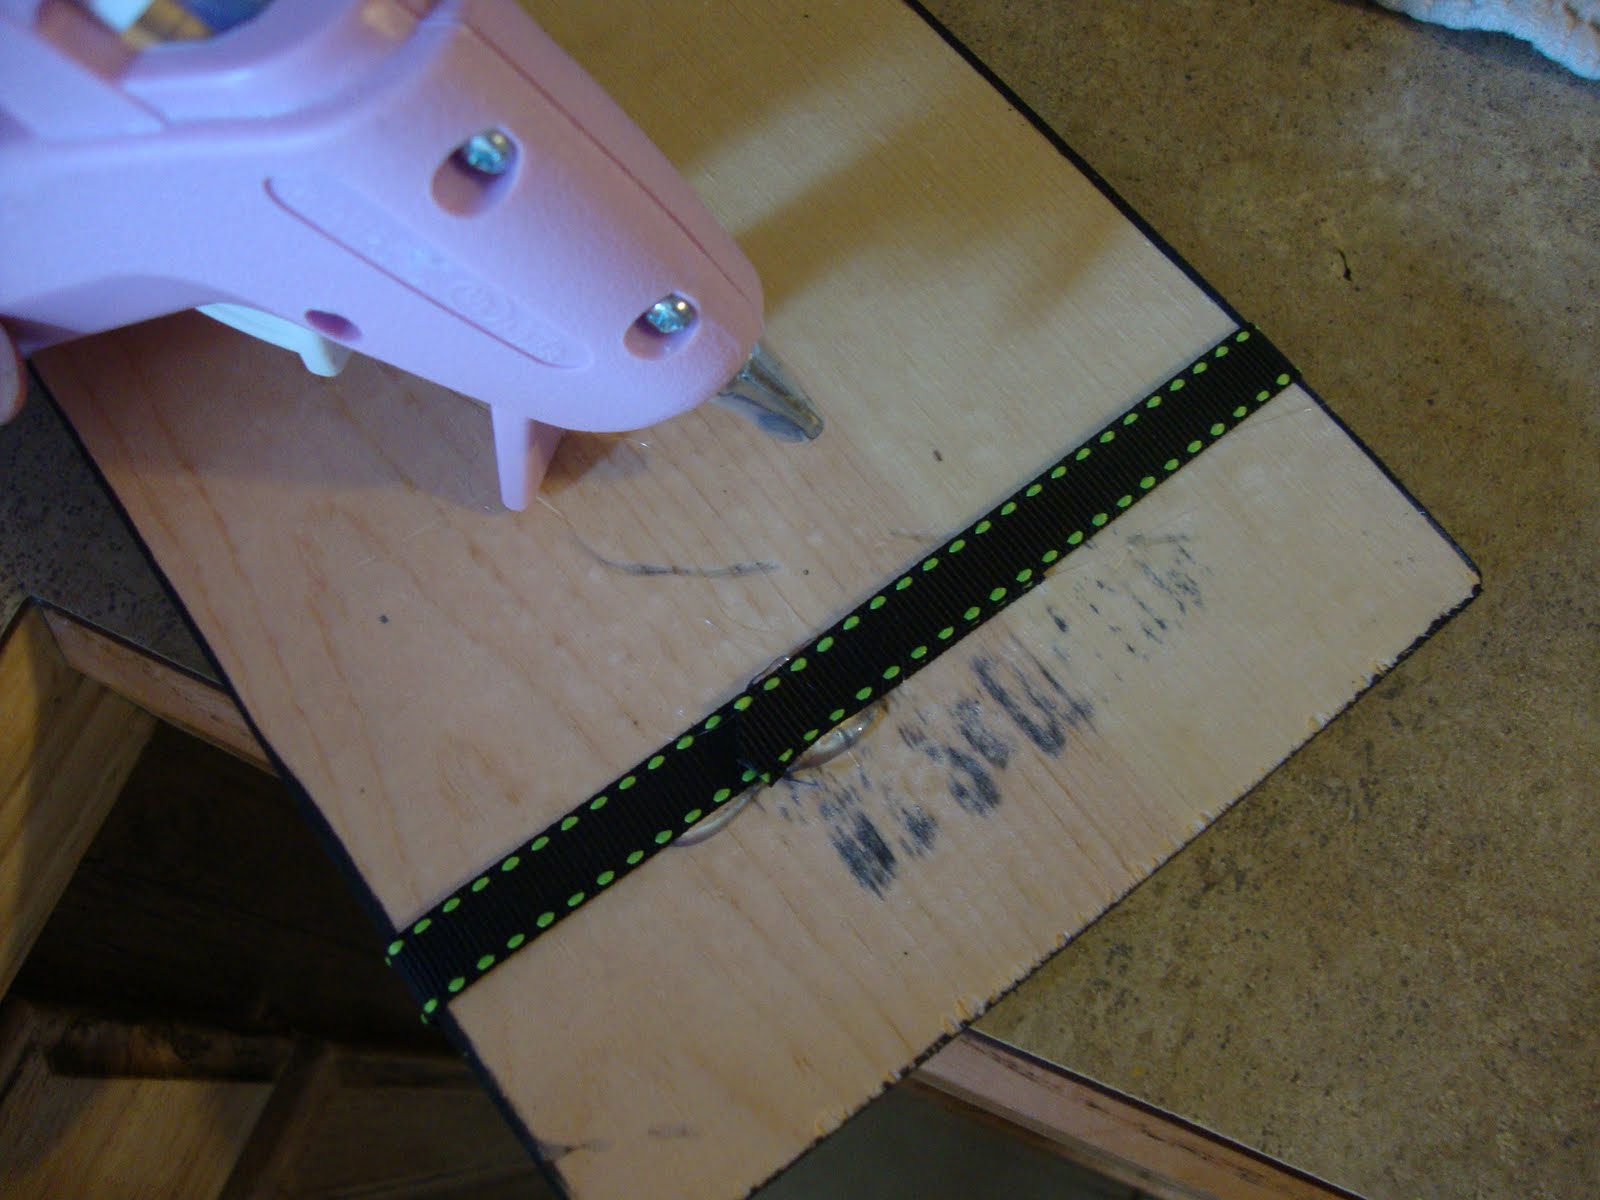

6. Glue on your cute littel spider! ;)

7. Apply Vinyl Lettering

8. Distress the edge of your sign with the ink pad and He is ready to sit on a shelf or add a nail hanger to the back and hang him on the wall for all to see!

INSTRUCTIONS FOR HAPPY FALL BLOCKS
1. Paint your Blocks Brown

2. Modge Podge Paper onto your blocks

3. Sand edges

4. Drill a small hole in the center of your smaller block
for the flower to sit nice and flush onto the block

5. Apply Vinyl Lettering

6. Hot Glue the flower into the hole you drilled
7. Add your raffia

~Now you are ready for Fall!~

INSTRUCTION FOR HOME SUBWAY ART
1. Paint your board any color you wish.
(or you could use cute scrapbook paper
and modge podge it!)
(I used caramel apple)

2. Sand edges if desired
(I did not sand this time!)
3. Apply Vinyl Lettering
(it will be 1 large sticker you just apply all at once!)

Done!!
Hang it on your wall,
stand him up on a shelf
or give as a special gift!!

INSTRUCTIONS FOR BABY SUBWAY ART
1. Paint your board any color you would like
(or use cute scrapbook paper to modge podge it)
(I used antique white)
2. Sand edges if desired
(I did not sand this time)

3. APPLY VINYL
This step is easier than it looks!
Your Black Vinyl will come as 1 large sticker!
You simply apply it to your wood in 1 piece....

Your Colored Vinyl will come like this:

Simply cut the "stats" apart and fill in the holes....

Easy Peasy!!!
Just place each sticker in the
designated spot to complete your art....

DONE!
CUTE!
FABULOUS!
ENJOY!!!!!!

INSTRUCTIONS FOR:
Teacher Name Blocks

1. Sand wood if needed
2. Paint all sides of your wood BLACK where the paper will not be. Including the backs.
(If your teacher puts this on his/her desk, most likely they will see the back side all day.)

3. Modge Podge the faux looking chalkboard paper to the front of your blocks.
Modge Podge steps here:

4. Sand edges.

5. Apply "Chalk looking" Vinyl Lettering and Red Apple to your blocks.

6. Add Ribon around both blocks

7. Ready to Give!


INSTRUCTIONS FOR:
Now and Forever Picture Tile
1. Clean tile of any dust
2. Measure center of tile
3. Glue picture frame to center of tile.

(Next time I will use my hot glue gun!
The Tacky Glue squished out and took forever to dry!)
4. Apply Vinyl
5. Insert Picture

(If giving as a gift: you could even use the picture from their wedding announcement)
FATHERS DAY PLAQUE
1. Paint your wood any color you'd like
2. Sand edges
3. Apply Vinyl Lettering

4. Glue the Picture Frame to the wood
(Next time I will use my hot glue gun!
The Tacky Glue squished out and took forever to dry!)

5. Insert Picture

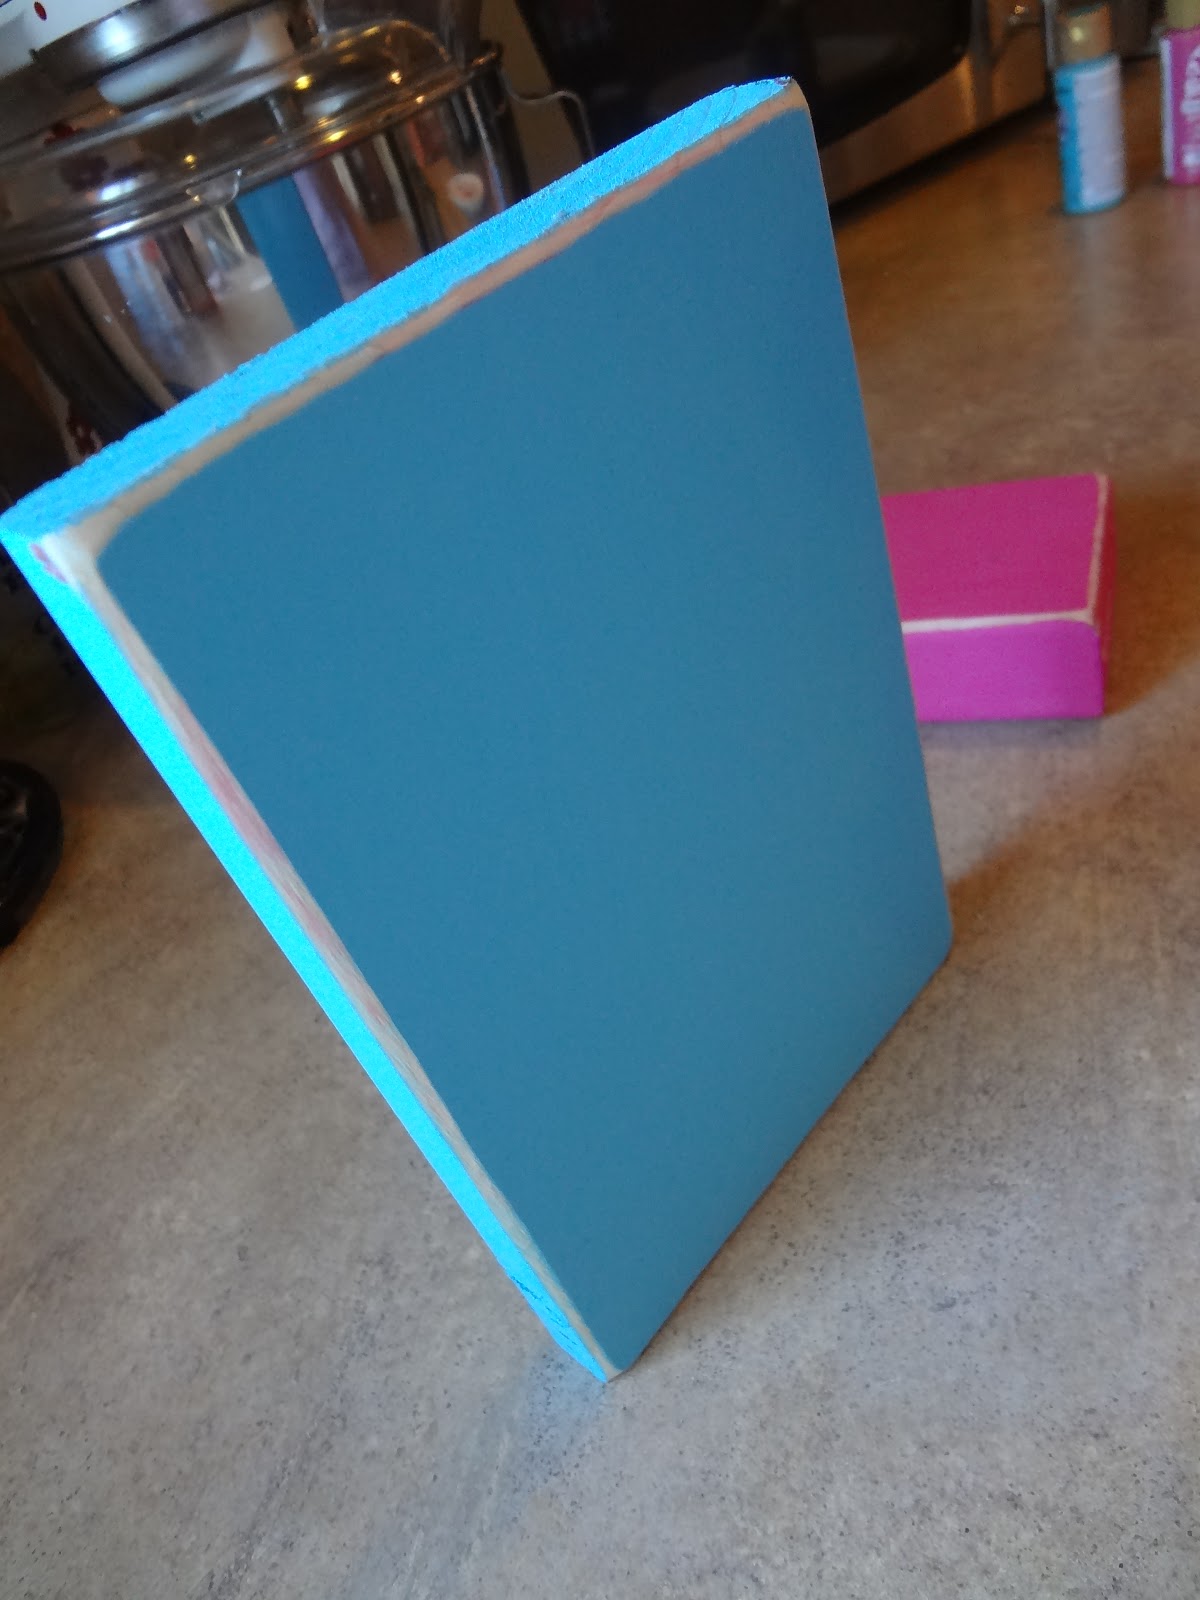
DOUBLE SIDED SPRING & SUMMER BLOCKS
1. Sand any rough spots if needed. (I did not need to)
2. Paint all sides of blocks where paper will not be, any color you wish.
Paint all sides of bottom block
I spray painted mine "celery" or a light sage green to match the paper.

3. Modge Podge your cute scrapbook paper to your blocks
Steps to modge podge here:

4. Sand your edges

5. Apply Vinyl Lettering

6. Antique the edges if desired

6. Add embelishments


7. DISPLAY SOMEWHERE WHERE EVERYONE WILL SEE IT! ;)


INSTRUCTIONS

"MAY ALL YOUR DAYS BE LUCKY BLOCKS"
1. Paint the sides and back of your blocks if desired.
(I used a dark brown.)
There is no need to paint the front of your block where the paper will go.
2. Trim paper to fit your blocks
3. Modge Podge your paper onto blocks
4. Sand edges of blocks
5. Apply Vinyl Lettering
6. Antique edges if desired
(I use an inking pad for scrapbooking)
7. Apply Ribbon

1. Trim paper to fit your blocks
2. Modge Podge your paper onto blocks
3. Sand edges of blocks
4. Apply Vinyl Lettering
5. Antique edges if desired
6. Apply Ribbon and embelishments
INSTRUCTIONS

NOTE: THE PLEXI GLASS HAS A PROTECTIVE FILM ON BOTH SIDES.
MAKE SURE TO REMOVE BOTH FILMS SO YOU HAVE A VERY CLEAR SHEET OF PLEXI GLASS!
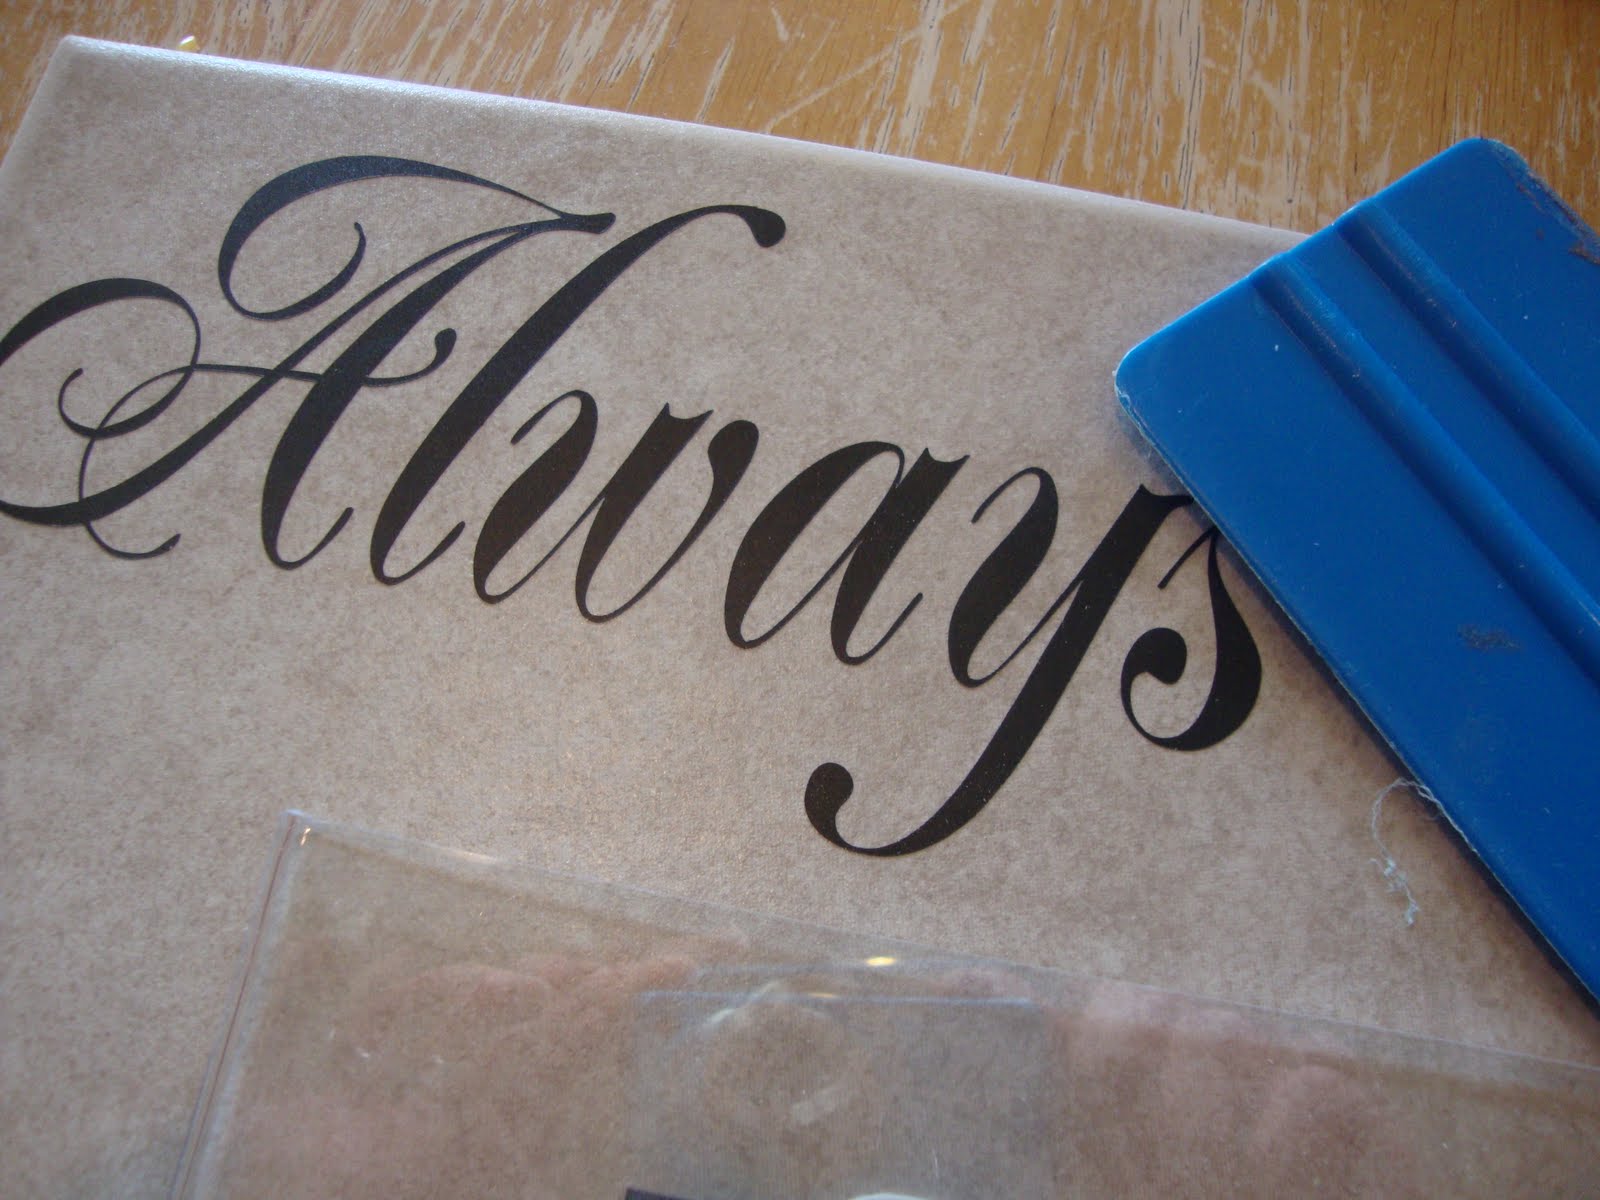
1. APPLY VINYL LETTERING TO YOUR PLEXI GLASS
The Vinyl will be cut in REVERSE so you will need to apply it to the back side of your plexi glass!!
This makes for cleaning and wiping off your dry erase markings easier.
2. TRIM PAPER to fit your 9"x11" plexi glass exactly.
you dont want to try and trim AFTER modge podging!
3. APPLY MODGE PODGE to the back side as well, going OVER the vinyl and entire
piece of plexi glass completely with modge podge.
Make sure you put the side of paper you want to see
face down!!!
Basically,
when you flip your plexi glass over, you will be able to see the correct side of the paper, as well as
read the vinyl correctly! Just like pictured above!
Dont worry about seeing the glue at first. Once dried, the modge podge is clear!
I use a matte finish modge podge so it wont look glossy thru the plexi glass.
4. RUN RIBBON BY CONNECTING YOUR 3 PIECES
of plexi glass together. I will predrill your holes for you, so attaching ribbon will be easy!
Now you are ready to be ORGANIZED for the week!!!
FEBRUARY 2010

MARCH 2010

APRIL 2010

